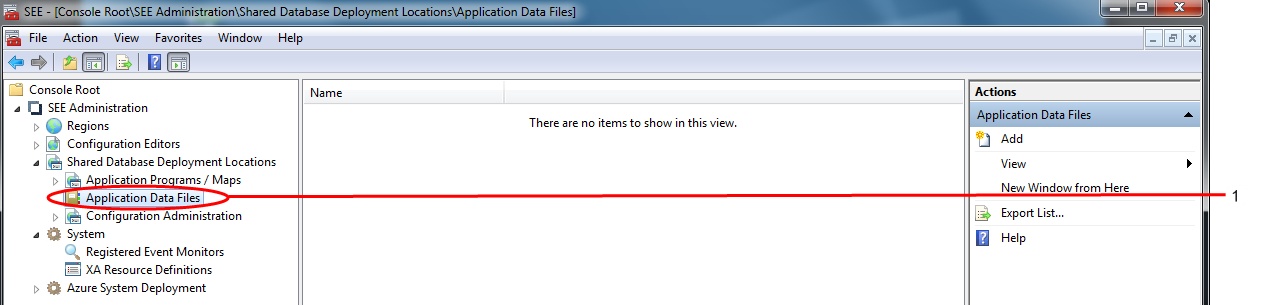
Enterprise Server for .NET Administration UI is used to add binary files such as programs and BMS maps to a data store database. To add a binary file: 


               -  
                  		  In the 
                     			 Tree pane under 
                     			 Shared Database Deployment Locations, click on 
                     			 Application Data Files. See 
                     			 1 in the diagram below. 


-  
                  		  If you have not previously done so, define the data store database that you want to add programs and/or BMS maps to. To do
                     this: 


                     -  
                        				Select 
                           				  Add in the 
                           				  Actions pane. See 
                           				  1 in the diagram below. The 
                           				  Define Data Store dialog is displayed. 


-  
                        				Enter the name of the database server instance you want to use in the 
                           				  Database server instance field and click on 
                           				  Next. See 
                           				  2 in the diagram below. 


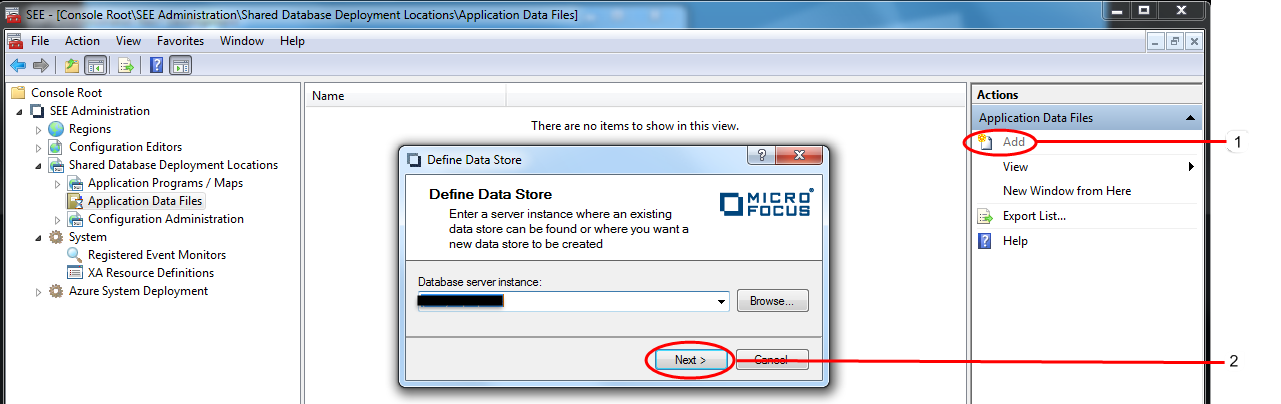
                           The next 
                           					 Define Data Store dialog page is displayed.
                           				  
                         
-  
                        				Either select an existing data store from the list, or click on 
                           				  Create new to create a new data store. See 
                           				  1 in the diagram below. 


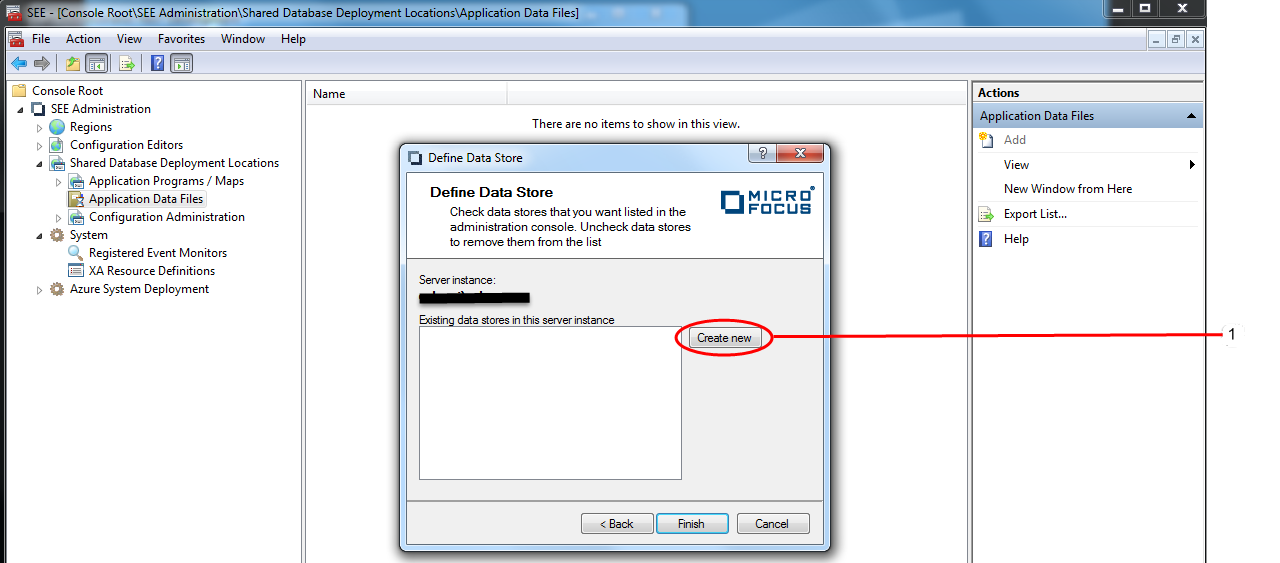
                           Clicking on Create new displays the 
                           					 Create New Data Store dialog.
                           				  
                         
-  
                        				Enter the name of the new data store in the 
                           				  Data store name field and click on 
                           				  Create. See 
                           				  1 in the diagram below. 


                           The data store is created, the 
                           					 Create New Data Store dialog is dismissed and the name of the data store appears in the list of available data stores in the 
                           					 Define Data Store dialog.
                           				  
                         
-  
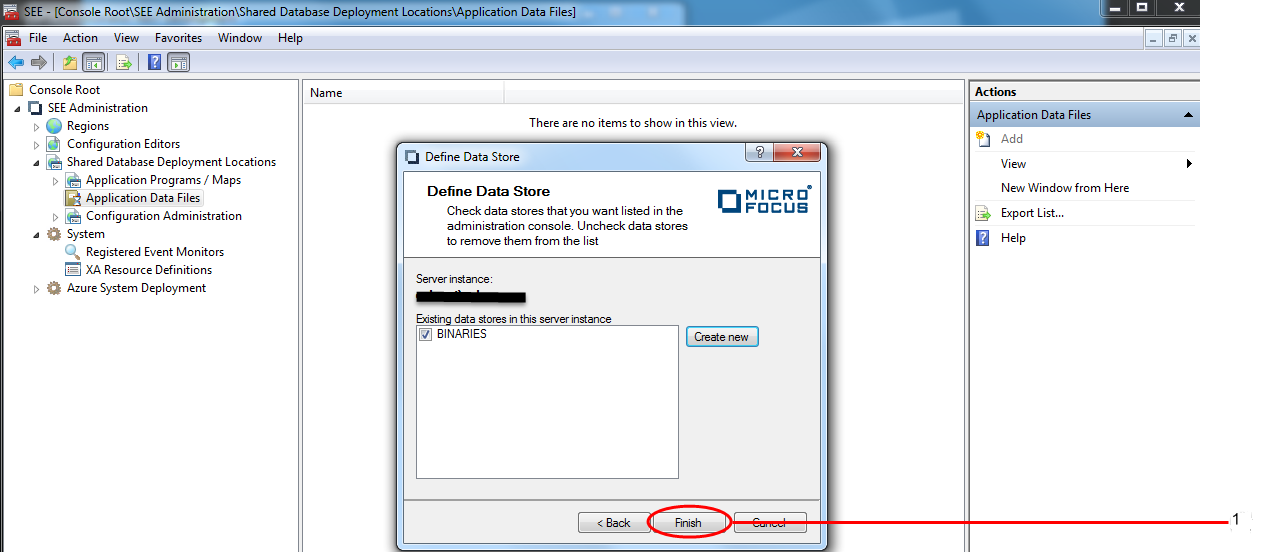
                        				Select the name of the data store that you have just created and click on 
                           				  Finish. See 
                           				  1 in the diagram below. 


-  
                  		  Select the data store that you want to add programs and/or BMS maps to. See 1 in the diagram below. The 
                     			 Data Store view is displayed in the 
                     			 Results pane. 


-  
                  		  Click on the 
                     			 Upload button. See 2 in the diagram below. 


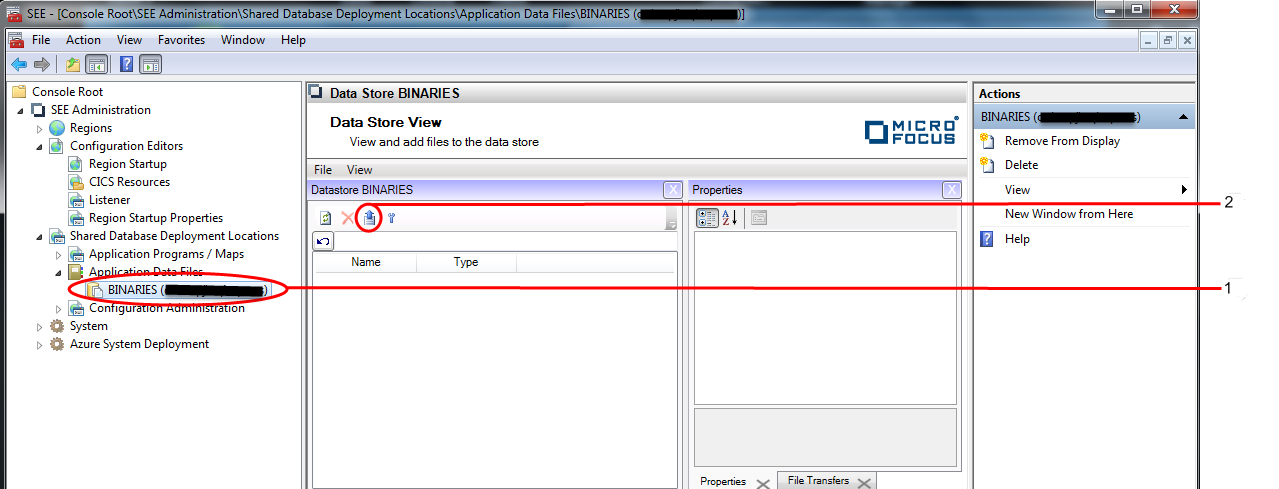
                     The 
                     				Upload data files dialog is displayed.
                     			 
                   
-  
                  		  The files to be uploaded are specified as follows: 


                     -  
                        				Enter the names of the files that you want to upload in the 
                           				  Select files to upload field. The names must be separated by a semi-colon (;). The 
                           				  Browse button is available to allow you to navigate the file system to select the files. See 
                           				  1 in the diagram below. 


-  
                        				Specify the name of the data store folder that will contain the uploaded files in the 
                           				  Data store folder field. If this field is left blank the files will be uploaded to the root folder of the data store. 


-  
                        				Select the 
                           				  Binary blob radio button. Any binary file, as opposed to a data file, being uploaded to a data store must have this option set. See 
                           				  2 in the diagram below. 


-  
                        				Click on 
                           				  OK. See 
                           				  3 in the diagram below. 


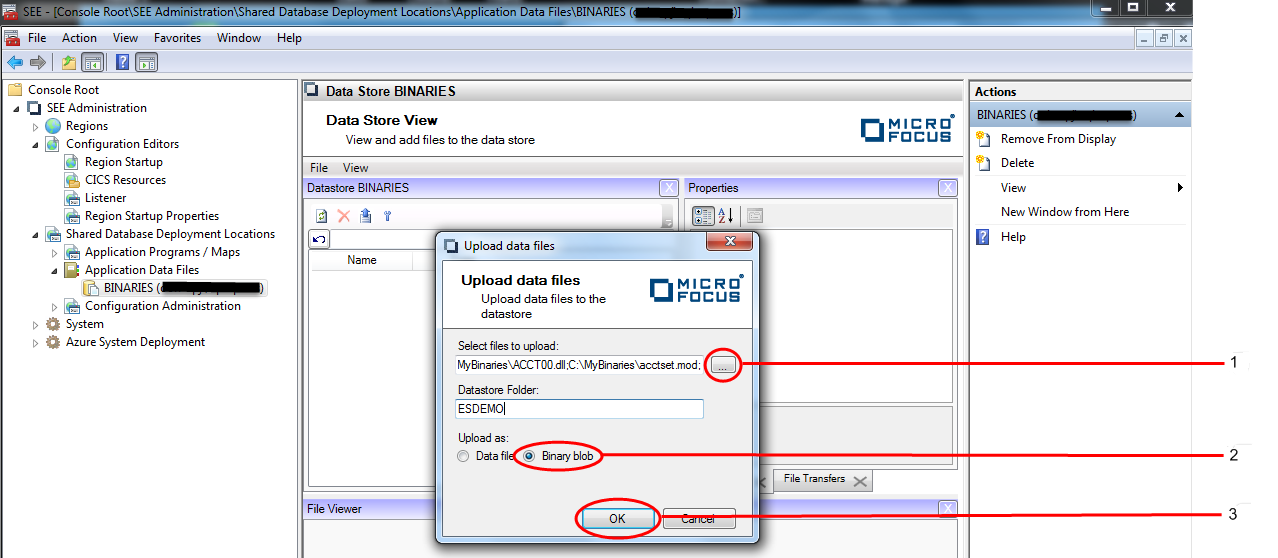
                           The selected files will be scheduled for uploading to the data store. 


-  
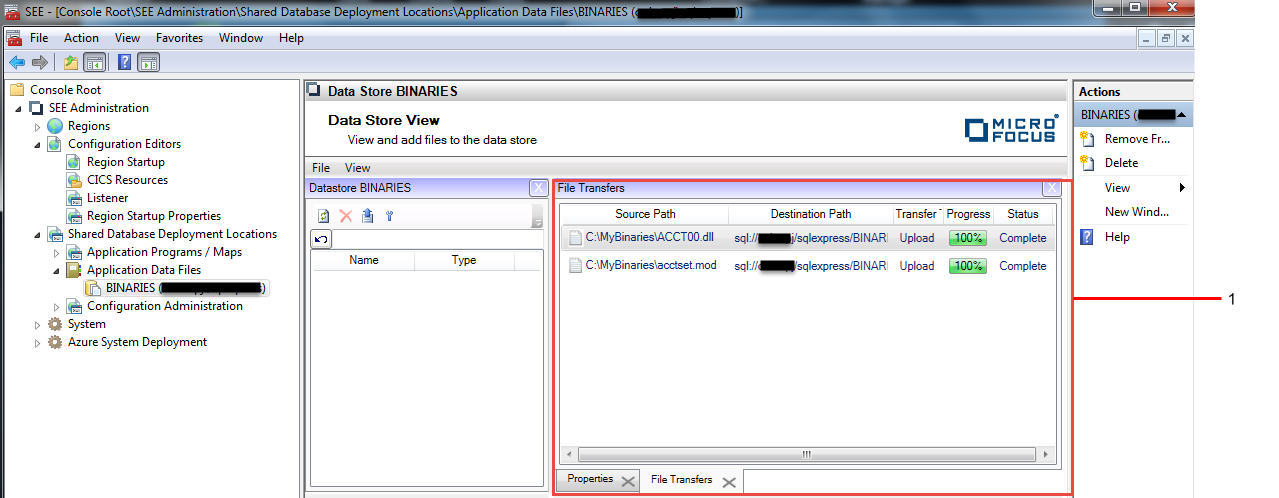
                  		  The progress of the files selected for uploading to the data store will be displayed in the 
                     			 File Transfers window of the 
                     			 Data Store view. See 
                     			 1 in the diagram below. 


-  
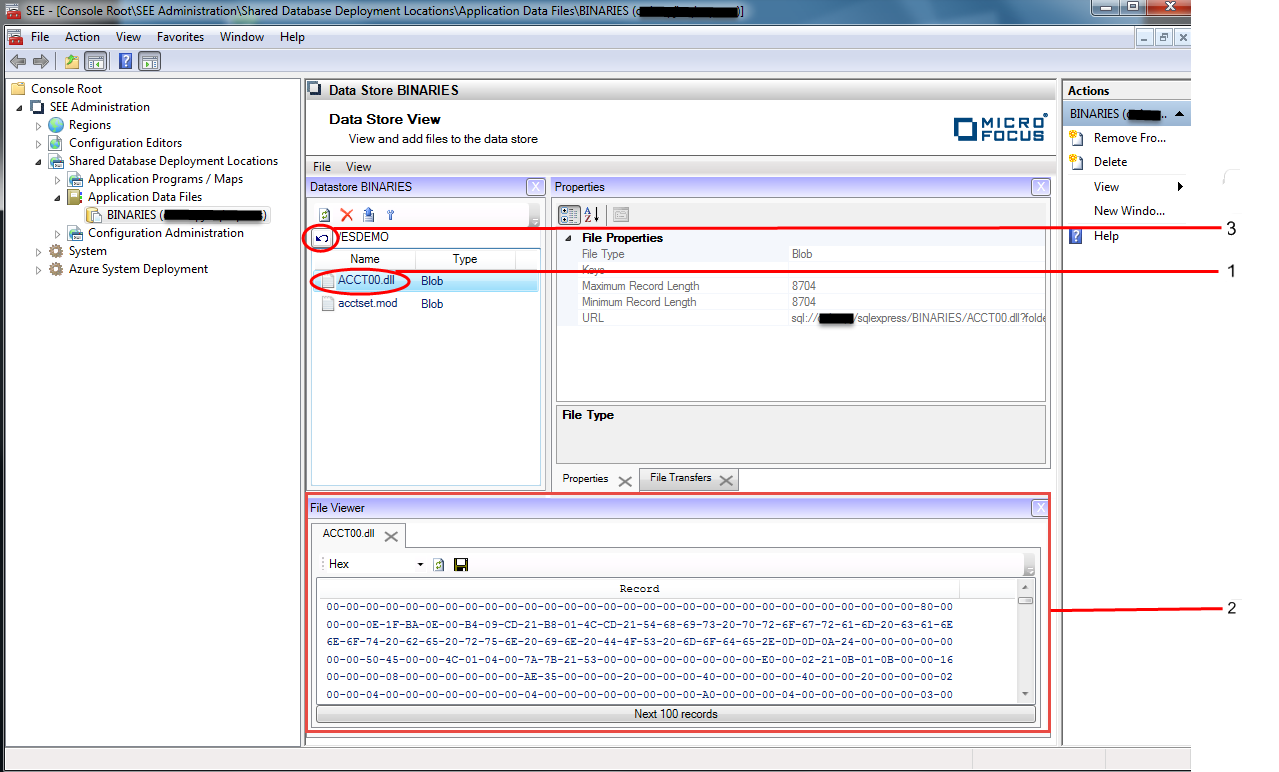
                  		  Once the upload of the files is complete, you can use the 
                     			 Data Store View to navigate to their folder and view their properties and contents. In the example above, the files were uploaded into the
                     ESDEMO folder. Double-click on ESDEMO in the left-hand pane of the 
                     			 Data Store View to navigate to the files in this folder. See 1 in the diagram below. 


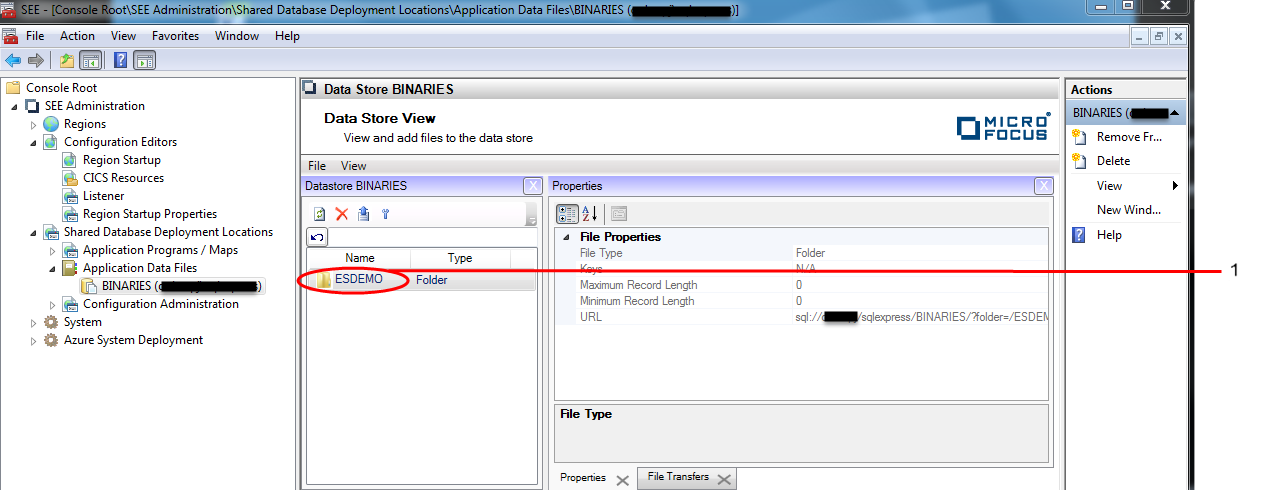
                     The contents of the ESDEMO will be displayed in the left-hand pane of the 
                     				Data Store View. 
                     			 
                   
-  
                  		  Double-clicking on the name of a deployed file will cause its contents to be displayed in the 
                     			 File Viewer window. See 
                     			 1 and 
                     			 2 in the diagram below. 


-  
                  		  Clicking on the 
                     			 Back button will navigate back to the parent folder. See 
                     			 3 in the diagram below. 


                   