This section shows the steps to configure an enterprise server so that you can run the IMS TM application.
Open Enterprise Server Administration
- In Server Explorer, right-click on
Micro Focus Servers.
- Select
Administration from the context menu.
Create an MSS-enabled Enterprise Server
- On the Home page of Enterprise Server Administration, click
Add at the bottom of the table of servers.
- On the first
Add server page:
- Type
IMSDEMO in
Server Name.
- Make sure the
Working Mode is set to
32-bit.
- Click
Next.
- On the second
Add server page:
- Click
Micro Focus Enterprise Server with Mainframe Subsystem Support.
- Click
Next.
- On the third
Add server page:
- In the
Creation Options group, make sure
Create TN3270 listener is checked and specify a port number. Do not specify a port smaller than 1025. Use a greater number such as
5039 instead.
- In the
Configuration Information field, enter the following two lines:
[ES-Environment]
IMSPROJ=c:\tutorials\ims
Setting the environment variable
IMSPROJ enables you to specify the paths to any subfolder in your project as
$IMSPROJ\subfolder.
- Type
Server for IMS in
Description.
- Click
Add.
The Home page is redisplayed, and a row for the IMSDEMO enterprise server is shown in the table of servers.
Enable IMS for Your Enterprise Server
To enable IMS support for the IMSDEMO enterprise server:
- Click Edit next to the IMSDEMO row in the table of servers.
The Edit page that appears contains a hierarchy of tabs and you should see open the following tabs: Server, Properties, General.
- Check Show Local Console.
- Check Allow Dynamic Debugging.
- Click Apply.
- Click the MSS, IMS and General tabs.
- Ensure that Mainframe Subsystem Support enabled is checked.
- Check IMS enabled.
This specifies that the IMSDEMO enterprise server can use the IMS support. Do not click Apply yet as there is more to do on this page.
Configure the Enterprise Server
For this demonstration you use the IMS Mainframe Subsystem Application that you created in Visual Studio. The build produced the required DBDGENs, IMSGENs, MFSGENs and PSBGENs as well as the .dll files in the loadlib subfolder of your project. You need to configure the IMSDEMO enterprise server to look for the .dll files and the IMS gen and database files in the loadlib subfolder of your project
To specify the locations of the required files:
- In the GEN file directory field, specify the subfolder in which all gen files have been created using the environment variable IMSPROJ: $IMSPROJ\loadlib.
- Click Apply.
- Click the Server, Properties, MSS, IMS, TM and General tabs.
- In the MFS path field, enter $IMSPROJ\loadlib.
- In the Application Path field, enter $IMSPROJ\loadlib.
- In the Transaction definition file directory field, enter $IMSPROJ\loadlib.
- Click Apply.
- Click the Server, Properties, MSS, IMS, and DB tabs.
- In the Database path field, enter $IMSPROJ\loadlib.
- Click Apply to save the changes.
Configure the MSS
To start IMS, an enterprise server needs to use the supplied CICS IMSSIT:
- Click the Server, Properties, MSS and CICS tabs.
- Specify IMSSIT in System Initialization Table.
- In the Resource Definition File Path field, enter the path to the Resource Definition File that you updated in the section Updating the Resource Definition File: $IMSPROJ\system.
- Leave the other fields blank.
- Click Apply to save the changes.
Define an Automatic Message Processing Region
You need at least one message processing region (MPR) to run an IMS application in an enterprise server.
To specify a message processing region for the IMSDEMO enterprise server:
- Click the Server, Properties, MSS, IMS, TM and MPR tabs.
- Click Add.
- In the Name field, enter: MPR01.
- In Transaction Class, enter: 001.
- In Description, enter: MPR for class 1.
- Click Add.
- Click Home at the upper left corner to return to the Home page of Enterprise Server Administration.
Associate Your Project with the IMS Configured Enterprise Server
To associate your project with the IMS configured server that you created, IMSDEMO:
- In Server Explorer, right-click IMSDEMO.
- Choose Associate with project > your project.
Start the Enterprise Server
- In Server Explorer, right-click IMSDEMO.
- Choose Start from the context menu.
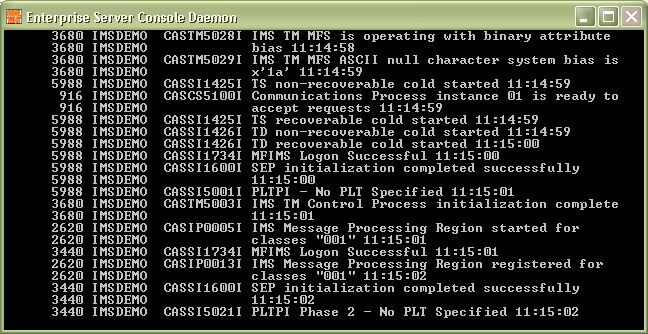
You can verify that MSS and IMS are enabled by watching the start-up messages in the Enterprise Server Console Daemon window. Messages should also appear indicating that the message processing region has started:
Deploy to Enterprise Server
You do not need to deploy the application to Enterprise Server as you configured IMSDEMO to search for the required files in your Visual Studio project directory. Enterprise Server finds the application files that it needs to run using the region IMS configuration entry, MSS|IMS|TM Application path: $IMSPROJ\loadlib.


